
There’s a wealth of information available to every Planview AgilePlace user through the use of the Planview AgilePlace Application Programming Interface (API). The API can be used to extract status information for a custom report, automate routine tasks such as moving or updating a card, synchronize data with another system, and many other useful tasks.
However, if you’ve never worked with an API before, getting started can be a little overwhelming. Thankfully, there are great tools available to make it easier. In this article, we are going to look at one of my favorite API tools, Postman.
Getting Postman
If you have Google Chrome, you can get Postman as a Chrome extension. If you are on a Mac, you can get Postman as a desktop application. I expect Postman to release a Windows desktop app in the future.
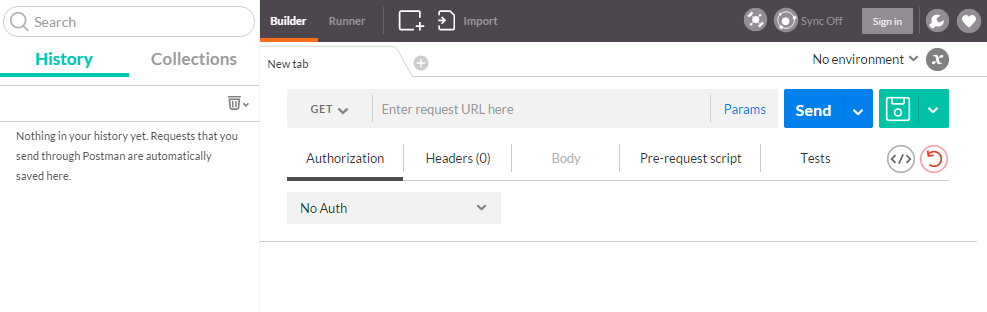
Once installed, you should see the request “Builder” screen.
Making your first API request
For your first API request, we are going to retrieve a list of boards from your account.
Enter your account URL and credentials
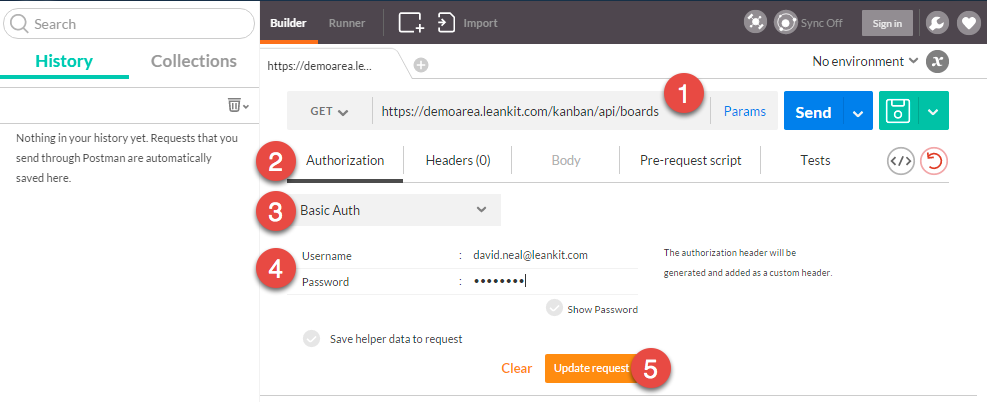
- Enter the URL for the request. In this example, the URL is
https://demoarea.leankit.com/kanban/api/boards. We will need to replacedemoareawith the name of our Planview AgilePlace account. - Click on the Authorization tab, if it is not already selected.
- Change “No Auth” to “Basic Auth.”
- Enter your account email address and password.
- Click the “Update request” button.
Update the request headers
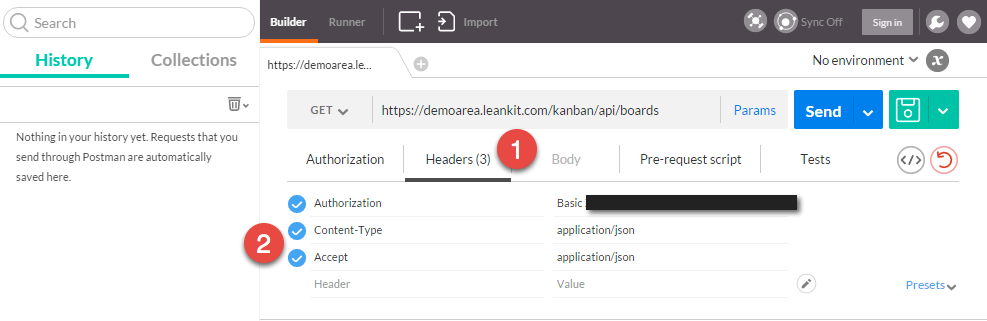
- Click on the Headers tab.
- Add two headers:
Content-TypeandAcceptwith the valueapplication/json.
Setting the Content-Type and Accept headers lets the API know that any data we send will be JavaScript Object Notation (JSON) format, and any data returned should also be in JSON format.
Submit the request
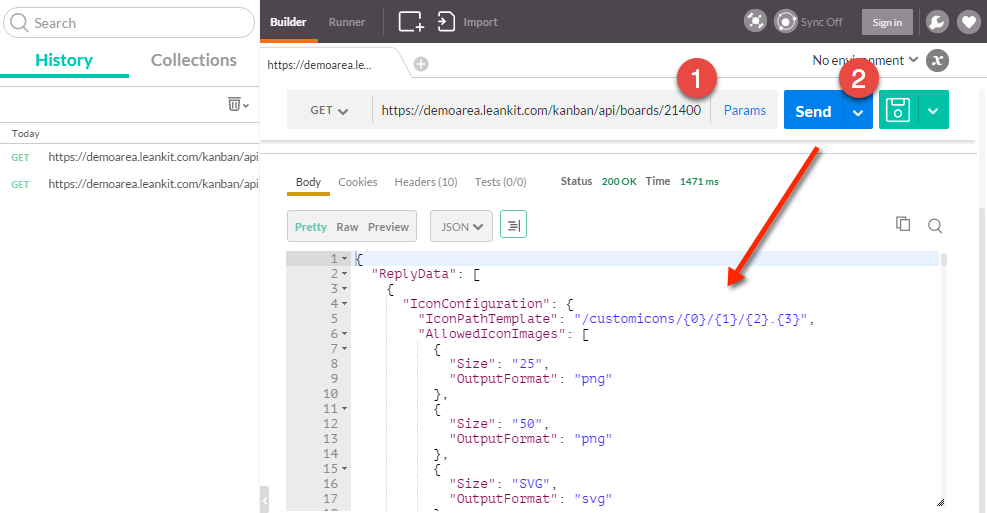
We are now ready to make the request! Click the “Send” button. As long as the URL and account information is correct, we should see something like the following image.
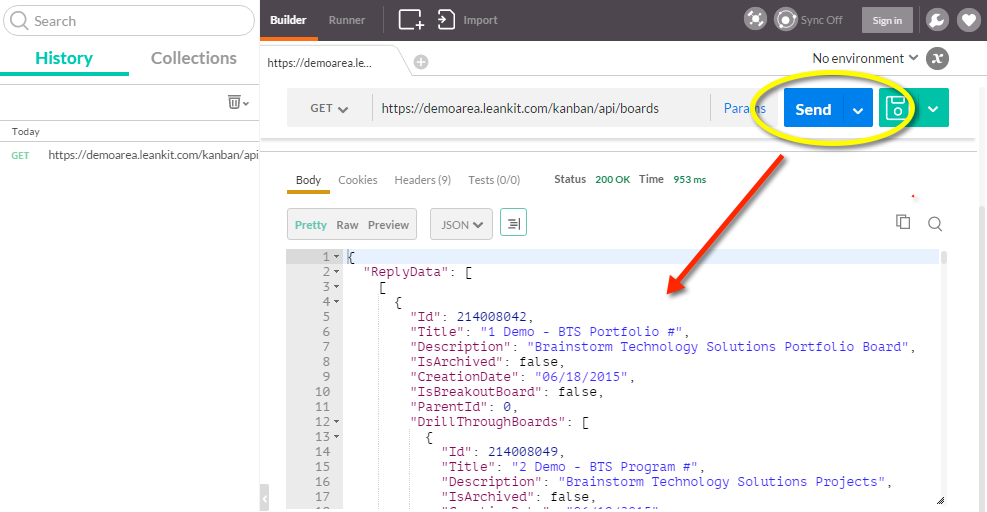
A response from the API will almost always be in the following format:

We should now have a list of boards that includes each board’s Id, Title, Description, CreationDate (date the board was created), and other basic information.
Request a single board
Now that we have our list of boards, we can use the Id of a board to get a single board with all its details, such as users, lanes, and cards.
- From the list of boards in the previous request, let’s copy the
Idof a board. Update the request URL by adding to the end a slash (/) and theIdof board we copied. Our request URL should look something like:https://myaccount.leankit.com/kanban/api/boards/1234. - Click the “Send” button.
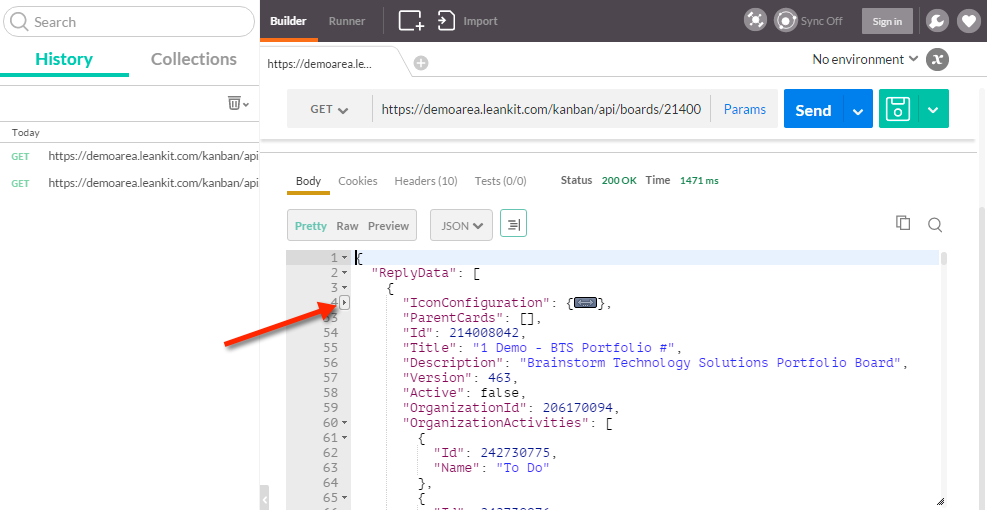
Collapse blocks of data
Postman not only formats the JSON data to make it more readable, it makes it easy to collapse sections data so you can focus on the information you care about. To collapse or expand blocks of data, click the arrow to the left.
Save the request
One of the nice features of Postman is the ability to save requests, so we can reuse them later. Let’s save the request for the board so we don’t have to go through all those previous steps in the future.
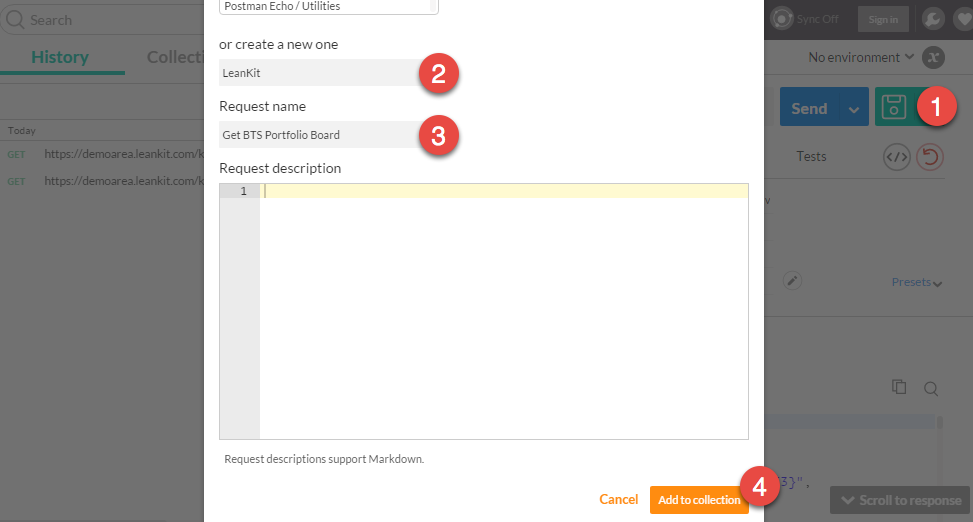
- Click the save button.
- Choose a collection or create a new collection. A collection is like a folder to store your requests. We can create a new collection by entering a name under “…or create a new one.”
- Enter a descriptive name for the request.
- Click the “Add to collection” button.
Search for cards
For our next trick, we are going to search for cards.
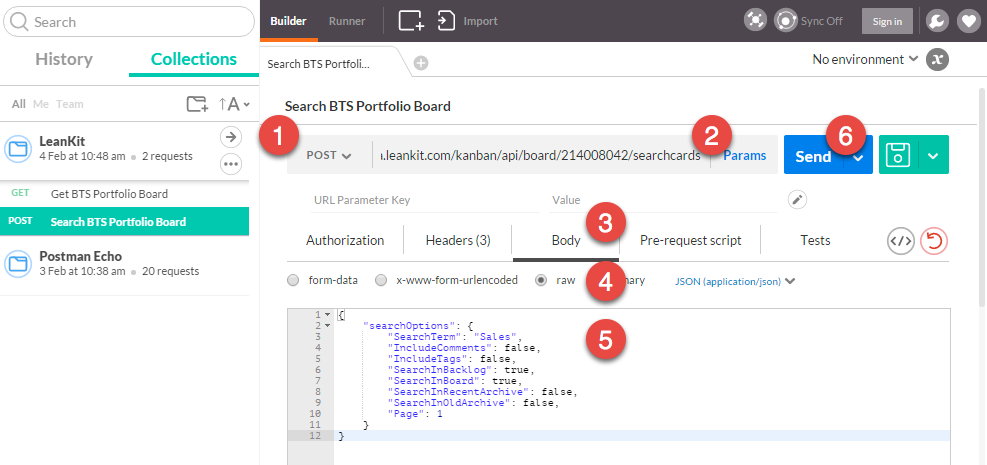
- Change the request type from GET to POST.
- Update the URL of the request, changing
myaccountto match our account name, and1234to match our board ID.https://myaccount.leankit.com/kanban/api/board/1234/searchcardsNote:
/board/in this URL is singular instead of plural, as in previous requests. - Click on the “Body” tab.
- Select the “raw” body format.
- Update the body with the following JSON:
{ "searchOptions": { "SearchTerm": "Sales", "Page": 1 } }Note: Change the
SearchTermto any text that would match the title or description of a card on your board. A list of all search and filter options is available in the Search Cards documentation. - Click “Send” to submit the request.
Search results
It’s important to point out that the JSON returned by the card search includes the following information.
| Property | Value |
|---|---|
| TotalResults | The total number of cards that matched the search. |
| Page | The current “Page” or results. |
| MaxResults | The maximum number of cards returned by the search request. |
If the number of cards that match your search exceeds the MaxResults, your results will be split up into “Pages” that require separate requests.
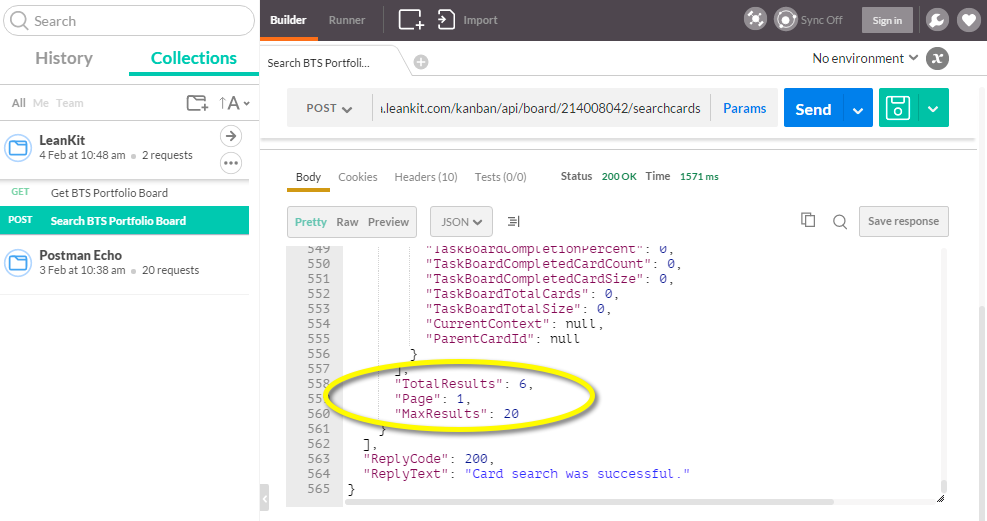
For example, if our search matched 33 cards ("TotalResults": 33), only the first 20 cards will be returned. To get the other 13 cards, we must change the body of the request to the following, and submit again.

How to update a card
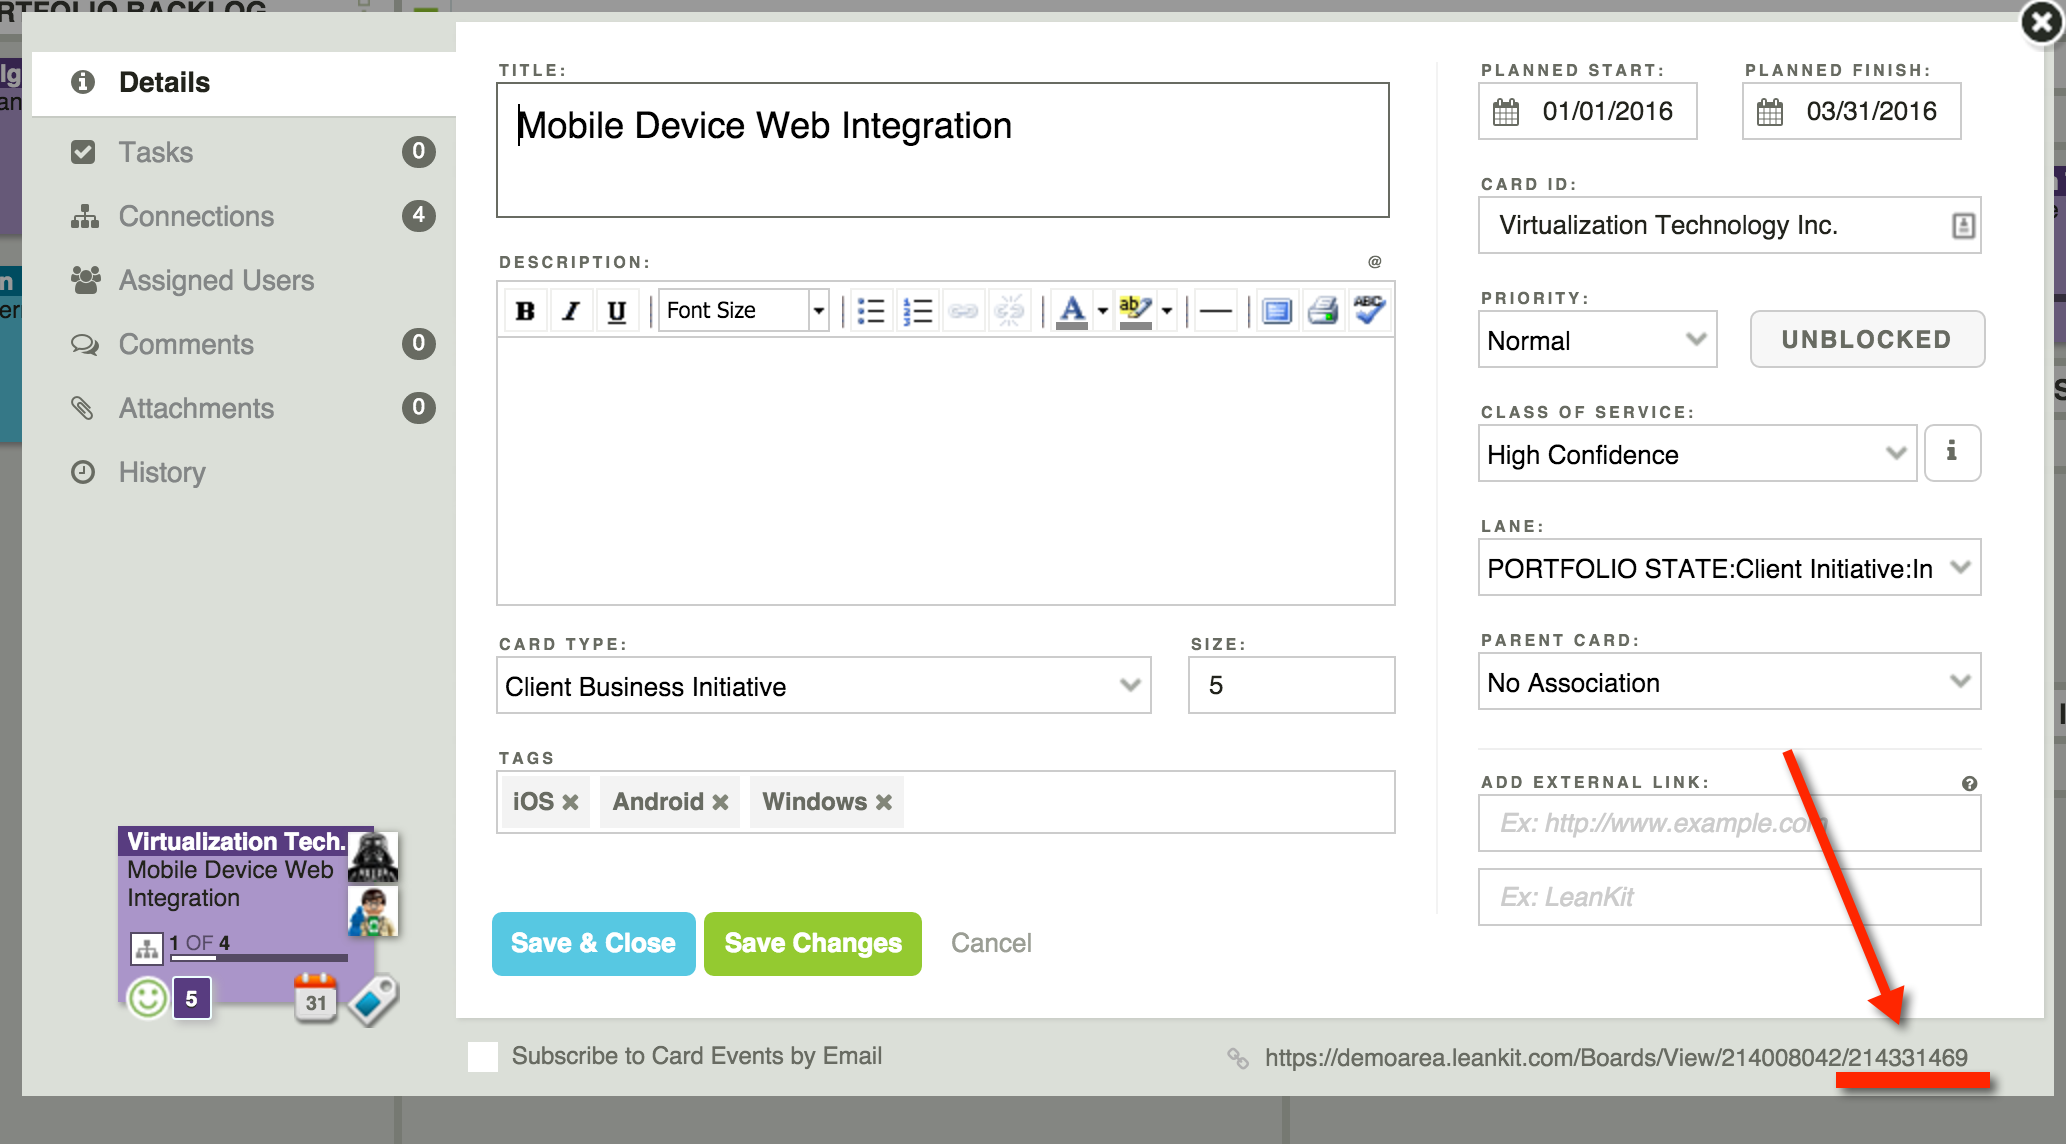
For the next example, we are going to update a card. We can change most of the information on a card, such as the title, description, planned start date, planned finish date, and assigned users, to name a few.
At minimum, we need to know the card’s ID. We can get this ID a few different ways. We can use the API to get the board or search cards, as in the previous examples, or we can find the card ID on the card itself in the bottom, right-hand corner.
Next, we’ll update our request.
- Change the request type to POST.
- Update the URL of the request, changing
myaccountto match our account name.https://myaccount.leankit.com/kanban/api/card/update - Click on the “Body” tab.
- Select the “raw” body format.
- Update the body with the following JSON:
{ "CardId": 123456, "Title": "Updated using the API" }Note: Change the
CardIdvalue to match the ID of the card you are updating, andTitleto the desired text. Or, update a different field. A list of all updatable fields is available in the Update Card documentation. - Click “Send” to submit the request.
If successful, the API response will include the updated card information.
![A Global Collaborative Work Management Blueprint [Video]](https://blog.planview.com/wp-content/uploads/2019/07/A-Global-Collaborative-Work-management-blueprint.png)